Friday, August 30, 2013

Batter's Up


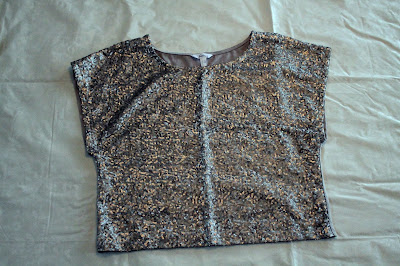
So...this is the second of two refashions I am doing for my stash busting challenge. Anyone who knows me, knows that I am a pretty good at thrifting.(Toot toot! Blowing my own horn here!) But anyone who goes thrifting with me is also at times bewildered by my choice of purchases. This sparkly crop top may be ok...but that oversized beige sweatshirt with a skirt for a collar....YIKES! Let me tell you though, it is a soft fabric and the color is quite nice especially when I paired it with sparkle!


Here is the sweatshirt in its deconstructing phase...no kidding, I could make a skirt out of that collar! 


Here is the inspiration and pattern for my refashion, a sweatshirt that my daughter has. I really liked the raglan sleeves and thought that it would make a perfect pattern for my refashion. A glittery baseball tee. So I began the process of copying the pattern from the sweatshirt and cutting it out. You can see below that I used the original ribbing on the sleeve on the new one as well. I did the same for the waistband as well. It only made sense and saved me a lot of work too!


My apologies for not taking more pictures of the process... I have to work on that! Short story is that I sewed all my pieces together after making the two front bodice pieces, one being the knit and the other was the sparkle as the overlay. I painstakingly picked out the ribbing from the original neckline and sewed it onto my new sweatshirt. 


I really like this sweatshirt and can think of so many ways to wear it. I am even more pleased that it is made from recycled garments and I sooo enjoyed the creating process on this one!

Oh yeah I almost forgot... hey Handsome....yeah you husband! So let me ask you... Does this shirt still look like an "old lady" shirt? Think very very carefully before answering.....




Thursday, August 29, 2013

My Thrift Style


I have been thrift shopping for as long as I can remember...waaaaaaay before it became cool. My first thrifting memories are of  my mom taking me to our favorite thrift store where I would spend all my time rooting through the baby clothes. I loved babies and their itty bitty clothes. So I bought clothes for my dolls. I remember loving it.
I still love to thrift shop. I've pretty much outfitted our family in secondhand finds for twenty years now. My husband was not a fan at first but after he saw the great things I found and for soooo cheap...I converted him!
I thought I would share some of my favorite finds in a series that I may do weekly called My Thrift Haul, in hopes that maybe I can convince you to give it a try.


Handsome and I just celebrated our 21st wedding anniversary and I choose to wear this vintage  black lace dress out for dinner.
I showed this dress to a lady who collects vintage clothes and she told me that it was a late 1940's dress. It has a metal side zip ( that I have already pinched myself with) and a velvet bow detail. The tag inside says that it was made in Boston.


 I love that the lace overlay is so on trend right now.


Dress: thrifted vintage Shoes:Franco Sarto Purse: a mystery thrifted Belt:Ann Taylor thrifted

This dress is a new favorite piece in my wardrobe that I will wear for many special events. I wonder who may have worn this before me and what special events she went to.


Wednesday, August 28, 2013

Easy Breezy


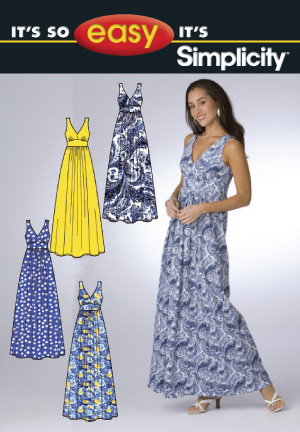
I am getting so close to the end of my Stash Busting Challenge! This fabric has been a veteran resident of my stash and I am pleased to say that it now resides on my closet. I always knew that this fabric would become either a dress or a maxi skirt. Unable to really decide... I did both. Another maxi dress. I know that I need to focus on making more separates but it is just so easy to throw on a dress in the morning or the evening as was the case here when I wore it out on a date with Handsome.

 Simplicity 2638

My Review: 

Pattern: Simplicity 2638

Fabric used: A polyester that is much like a linen but doesn't wrinkle at all! I lined it with a beautiful ivory cotton silk blend that feels so lovely against the skin.

Instructions:The instructions were straight forward and easy. 

Changes I made: I lined the skirt of the dress as well as the bodice and added two inches to the length. This dress didn't call for pockets and if you can believe it... I didn't add any. The skirt is made of three pieces so the seams are not placed exactly at the sides so I didn't add pockets for fear that they would make this fabric droop in the front. sad face. 

Repeat worthy? Yes! 


Wednesday, August 14, 2013

Maxed Out


I bought this fabric just before I began my stash busting challenge and it may have been one of the main reasons for initiating the challenge. I bought it on a whim for 99 cents a meter. Now, I thought that I was getting a great bargain and envisioned it in as a cute maxi dress but when I proceeded to work with it, I quickly realized that it is only worth 99 cents. If you look closely... the white stripes have stretched differently than the navy ones, making the fabric kind of wavy.


The other issue I had with it was that it is see through... I found this out when I saw the first pictures I took of it. It was then that I declared that this dress would be for the beach.
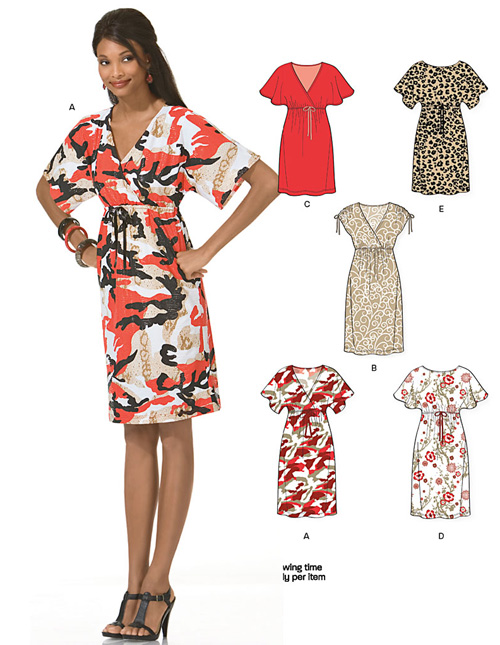
I used Newlook 6936 to make this dress, extending the hem to the ground. I self lined the bodice because I didn't think that this fabric would hem well for me. I think that was a good call.

Photo
Newlook 6936
My Review: 

Pattern: Newlook 6936

Fabric used: A 99 cent bargain knit cotton that maybe should have stayed in the bargain bin...

Instructions:I didn't use them because it was fairly straight forward.

Changes I made: I self lined the bodice, used a wider elastic in the waist and added in seam pockets.

Repeat worthy? Yes, I have made view e before and liked it a lot! Simple easy dress. 


When all is said and done, I do have a pretty nice beach cover up that is comfortable which was perfect for a day spent surfing with the family. I didn't surf but I am awesome at jumping in the waves! And picnic lunches...I'm awesome at that too!


Monday, August 12, 2013

Bringing Home the Bacon


Saturday was the Sewcial Bee... I was stumped on many levels..I knew I wouldn't have much time to devote to this project and to be quite honest..I didn't want to spend the entire day inside sewing when it was going to be a beautiful summer day. All that said... I thought that I would use this opportunity to conquer a project that I too often procrastinate doing. Welding beanies for husband. He needed new ones for work... here is where I stretch this parameters of the challenge a bit... the theme of the challenge was food. 
Bringing home the BACON.  oh my..


What are welding beanies you may ask??? They are little "hats" that welders often wear under their shields to protect their heads from sparks and dirt while they are welding. The peak is often worn to the back to cover the neck. My husband is fairly conservative when it comes to getting dressed.. BUT not when it comes to his beanies! The crazier the better! Case in point..


 Folklore skull pattern...


Easter Island heads...


Here is a picture of how these beanies are worn except, that my husband also wears a hard hat. Safety first!


These babies consist of sixteen pieces in total. Which is why I so often procrastinate making them. I took about four hours to make these two beanies plus I cut out enough pieces for four more. Already half way there for the next time he needs one! The time limit of the Sewcial Bee pushed me to the finish and Husband was so grateful!

I know one thing... I never thought that I would be posting a picture of a welder on my blog!

Thursday, August 8, 2013

Picnic Skirt


I feel as though these pictures should be staged on a picnic blanket, with a beautiful wicker basket overflowing with yummy goodies and possibly the cutest puppy you have ever seen frolicking in the background... can you picture it? This skirt just gives me that feeling...ummm....probably because I once ate off  it when it used to be a tablecloth! True story!! A lapse in judgement on my part!!  I'm sitting there eating a lovely dinner with my family and I'm thinking...Why did I use this fabric for a tablecloth!?? These people are going to spill gravy all over it and it will be ruined!! As soon as dinner was over, I whipped it off the table and into the wash then hid it safely back in my stash! Whew! No stains!


I made this skirt from the McCalls 6706. I am loving this pattern so much! Again I moved the zipper from the side to the back and added pockets. You can see the previous skirts I made and my review, here and here


I paired my new skirt with a checked shirt and my Lia Sophia necklace. My best friend sells Lia Sophia and I wear this necklace a lot! I don't usually invest this much into a piece of costume jewelry but it was so worth it.
 I'm loving the pattern mixing of the floral and checks. I feel so girly and me in it. I am at a place in my life now that I truly want to wear what I like and what makes me feel confident. This outfit definitely put a little extra spring in my step today. 


I may not have had the picnic in the park today but I did have a great day with Husband walking around the Public Gardens and the waterfront. Our picnic just happened to be at a local pub where I had the best diet coke and sweet potato fries ever..minus the gravy!

Wednesday, August 7, 2013

Man Land


I know what you are thinking...What?! It's not a dress??! Well, from time to time I make creations for other  people that aren't dresses. 


So... this shirt was made almost two years ago...yes, you read that right ..TWO years ago. Shame on me. BUT today I finished it. Yay for me! More to the point ...Yay for Husband! 

The shame comes from the fact that I only had the buttons left to sew on. I put the entire shirt together and then stopped at the buttons? Really? It's not like I came to a particularly difficult part in the construction and stopped...it was buttons for heavens sake.

My husband is a patient man.


McCalls 6044

So on to the pattern... if I can remember. I used McCalls 6044. All I really remember is that I lengthened the body and the sleeves for my tall husband and that I enjoyed making this shirt. This is a good pattern to start with if it's your first attempt at a shirt. It doesn't have a back yoke and the cuffs were a simpler construction. 

My Review: 

Pattern: McCalls 6044

Fabric used: A checked shirting.

Instructions: I don't remember having any difficulty with this pattern and found it enjoyable.

Changes I made: Husband is tall so I added length to the bodice and to the sleeves. I can't remember how much exactly but I know that I took Husband's measurements before cutting it out.

Repeat worthy?  I would like to make this shirt again, except next time I would finish it quicker!!  


Back view.


Handsome wasn't home to model his shirt so I put it on my dress form but she doesn't do it justice at all. Maybe he will model it for a pic when he wears it for the first time. Maybe...


Monday, August 5, 2013

Red Tulips


Anyone know a 13 yr old girl who could give me lessons in taking selfies? Or not. My "photographers" are MIA right now, so I had to dig out the tripod and give it a go. I failed miserably. I cut my head off, was out of focus, I forgot to take my sunnies off or I just plain forgot to smile! I worked myself into a lather of sweat and so these pics will just have to do. 

Now on to the dress... I bought this fabric at a thrift store! Can you believe that?!! Who gives away a lovely gem like this and I wonder what plans they may have once had for it? I love the color and the print, it feels very "me"and I love red tulips! I think that it is a silk shantung. I only had a meter and a half of this fabric so my pattern choices were limited. Anytime I have a shortage of fabric, I pick a pattern with more and smaller pieces, giving me the ability to play "puzzle" with them on my fabric. I thought that Newlook 6774 would fit the bill. And it did.


My Review: 

Pattern: Newlook 6774

Fabric used: Silk shantung that I thrifted!

Instructions: Were clear and straightforward.

Changes I made: I lined the skirt portion of this dress in addition to the bodice. I hand stitched the crossover part of the bodice to prevent gaping. Instead of using the fabric tabs on the straps of this dress, I choose to pleat and hand stitch them in place with tiny, invisible stitches. I also added inseam side pockets. Of course!

Repeat worthy?  I recommend this pattern but I'll probably move on to another...


After my selfies didn't go so well, I put the dress on my form and lugged her outside for better pictures. What my neighbors must think!


Here is a close up of the pleating that I added to the straps. I am so pleased with my hand stitching here and I love the shaping it gave the dress.


I remembered to get a back view!


Here is the one picture that my head wasn't cut off AND I smiled. Still blurry... but I'm smiling.