Monday, April 29, 2013

Long Waisted


I have a long torso... I know this because time after time I have the problem shown above. If I pull this dress up to where it should be...umm...covering my bust (please and thank you), then the dress becomes too short and the waistline doesn't sit on my waist, which then leads to poor fitting in the backside (and the front side).
In the picture on the right, I pulled the dress down so that the waistline sat on my natural waistline, which gave me a nicer fit but only covered half of my bust! I was left with no other choice...this dress was getting the chop!


Making that first cut is always so hard for me. I doubled the width if the elastic I was using(1.5 inches wide x 2=3) , added quarter inch for seam allowance, measured up from the waistband, marked it and cut! Whew...now I'm committed.


Here's what it looked like after the chop. The bodice of the dress will become the waistband of the skirt. I then folded the new waistband down to meet the seam allowance of the existing waist seam.


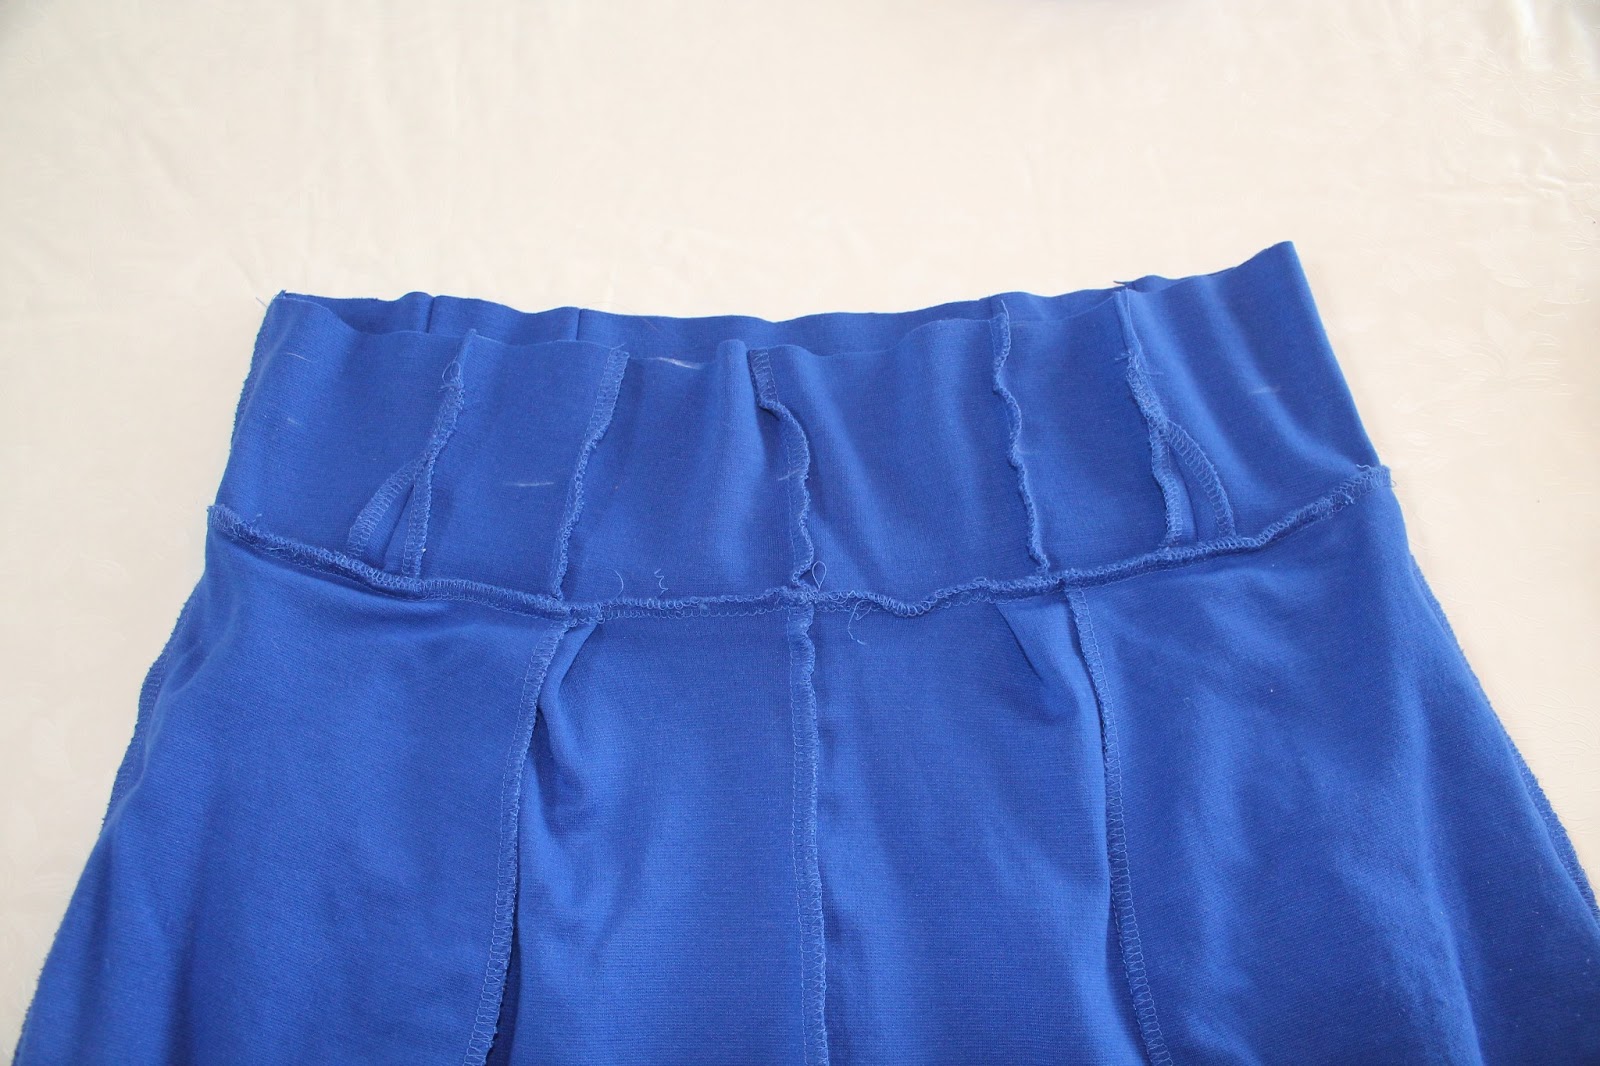
 Using my serger, I stitched the newly cut edge to the seam allowance, being careful to stay within the seam allowance only. I disengaged the knife on my serger to prevent any mishaps.


Here you can see that the bodice part of the dress is now a casing for the elastic. I used 1.5 inch non-roll elastic. This was the first time I have used the non-roll type and I really liked it...and get this...it doesn't roll. For real.


Pulling the elastic through was a bit time consuming but was worth the effort. I am so pleased with the end result. This project cost me $4.50 for the dress at the thrift store and $2 for the elastic. I checked my local fabric store for some ponti cobalt blue fabric like this dress is made of....I would have had to pay $16 a meter for it. I think I got a great deal and saved myself a lot of work too. 


This skirt will be a great addition to my closet, and fun to style many different ways!

Friday, April 26, 2013

Boot Cut Gets The Boot


I have been on the hunt for a pair of black skinny jeans. They have eluded me because I couldn't find the right fit. Being a runner, I have some decent sized thighs and calves..so when I try skinny jeans on they are way too tight in the legs and yet too big in my hips and waist. I have taken jeans in for other people but haven't done it for myself, until now.


 I found these jeans at my favorite thrift store and because they fit so well in the waist and seat, I thought that they just might work for a refashion into skinnies.


 I used another pair of jeans as a template for the new ones. When I am asked to do this alteration for anyone else, I always ask them to bring a pair of jeans that they really like. It makes it so much easier for me. 

I'm sewing a new seam on the outside of these jeans because the existing outside seam is not topstitched, making it a more simple task. First, I carefully line up the two pairs, matching the crotch seam. 
Then, using my chalk, I trace a new seam line and carefully duplicate the same line on the other leg. I sew this new seam, then trim and serge the seam allowance. I also hemmed them to an ankle length.

I realize that my hems don't look the same length but they are,
I just have one foot lifted...trying to be all model like. HA!

  I know that some people hate hemming jeans because sewing over the bulky seams is difficult but I don't. I have a little trick that I will share in another post.

Wednesday, April 24, 2013

Mom's Always Right

 
I ADORE making and wearing dresses but of course I don't wear them everyday.(at least not when it's cold) I like wearing my jeans and with my pledge for the me-made-may 2013 challenge not too far off, I thought I had better get to sewing a top or two.      
                      
I bravely took off my cardigan for a full view of my top... but it was soo cold!

I made this cute top from Newlook 6186, view D. I didn't make any major changes except that instead of topstitching the binding around the neckline, I handstitched it in place from the inside. Topstitching a binding in place is something I need a LOT more practice at. My mom always taught me that handstitching the finishing touches like hems is always nicer anyway. Mom's always right.

If I were to make it again, I would make a smaller size. The sizing thing with sewing patterns is tricky. Then again, the same is true in ready to wear clothing as well.


Top:self-made Cardigan:JCrew thrifted Jeans: Puzzle thrifted Shoes: Joe Fresh


Monday, April 22, 2013

Enough Already


 This dress has been hanging in my closet for quite some time now...unworn and ignored. Now that I see it in pictures...(albeit over exposed pictures! uggh!) I really love it. One thing is certain though, I must stop with the blue and white prints.  Two of my next three planned projects are blue and white. Enough already!


Dress:self-made Necklace:a mystery Belt:a mystery Shoes:Payless


 I used a favorite pattern of mine, Simplicity 2444 to make this dress. I think I have made this dress four times in total and three of those are blue and white. Embarrassing. You can see one of those dresses here. I did change things up a bit by adding sleeves...woooo!(insert sarcasm) All this said, I will most likely make this one again because it is classic and fits great! Maybe in a different color.


Friday, April 19, 2013

Canadian Summer


Yesterday's temperature went up to 10 degrees ...and when the weather gets that warm, I'm going for a skirt and bare legs. I will likely get a few "are you crazy?" looks.. but for the majority of us hardy Canadians, it's just time to bring out the summer wardrobes. 


This week, I was impatiently waiting for spring and decided that snow flurries or not, I was digging out my spring and summer clothes. It's always like Christmas for me to open those plastic totes that have been home to shorts, sundresses and all my other summery goodness. I often have forgotten what I have packed away and this skirt was one I hardly remembered having, let alone making. I had to go digging to find the pattern I used for this cute little skirt.


The rounded yoke waistband and pleated front details of this skirt get a little lost in the print but the upside to that is... you can't see the wrinkles either. Score! I used this Simplicity 2451 and don't remember having any problems making it. Then again...I didn't remember having this skirt at all.


Skirt:self-made Shirt:Old Navy Necklace: Lia Sophia Shoes: Payless 


Friday, April 12, 2013

Me Made May 2013


Wow... I just left a comment on 'So, Zo... What do you know?' pledging to wear one self-made or refashioned  garment everyday for the month of May. I'm excited to do this challenge. I hope to learn to remix the garments I have made into new outfits and be inspired to make more practical everyday pieces. (I love my dresses but they are not always practical)

With this challenge I'm allowed set my own rules, which is nice because although I do make full garments, I also like to refashion and alter clothing.I'm allowing those items to be included as well. Zoe doesn't suggest that anyone do 'panic sewing' to get ready for May...but I can't promise that! I know full well that I will likely do just that....as I have been known to do some last minute sewing in the past. The fact that I have signed up for this challenge before May 1st, is something to be celebrated!

The 'outfit post' component of this challenge will be fun and interesting for me. My only issue might be finding a willing and pleasant photographer on the days that Handsome is away. Any volunteers? 

Wednesday, April 10, 2013

Knock Out Knock Off...The Reveal

Skirt:self-made Lace top: F21 thrifted Shoes: Franco Sarto Bracelet: Club Monaco thrifted 


Well, here it is, my finished skirt. I really love it but was undecided how to style it for my first wear. I went for something not quite as spring-like as I would like but the weather isn't feeling much like spring so I thought I would go with black. Easy. 
For details on the construction you can check out this post :)

Monday, April 8, 2013

A Knock Out Knock Off

Oscar de la Renta  Tie-belt Pencil Skirt  (source)

See this knock out of a skirt.... it's only gonna cost ya $1200 bucks. Peanuts really. Ha! I have been pinning pink skirts on Pinterest to my DIY board, wanting to make one for spring and summer and when I saw this one...I knew I could make my own knock off version of it! Keep in mind that the Oscar original is surely made of fine Italian wool and mine is a stretch sateen and will probably wrinkle like a bugger...but my price tag of 12 big ones wins with this thrifty gal.


I just recently made this black and white print dress using Butterick 5455. I really liked the shape of the skirt and loved the pockets, so when I saw this skirt I knew instantly that this pattern would work with a few adjustments of course. The pockets of my skirt are not quite the same as the original but I like them just as well. The hem of the skirt has a trapunto (which is just a fancy word for quilted) band. To get this look, I first folded up the hem of my pattern by 4 1/4 inches on front and back pieces.


To make the trapunto band, I cut a 7 inch strip of fabric, long enough to fit around the entire circumference of the hem.  I then folded it in half, wrong sides together and pressed it.


To achieve a nice quilted effect, I cut a strip of low loft quilt batting 3 1/2 inches wide and just as long as the strip. Lay the batting inside the folded band, tucking it tightly into the folded edge.


Starting with the folded edge on the right, I topstitched the band at 1/2 inch intervals. To keep my lines of stitching straight and even, I used my quilting guide. Be sure to measure from your needle to the guide, not from the edge of the presser foot.


After I followed the directions of the pattern to sew the body of the skirt together, I stitched the band to the bottom of the skirt before sewing the back seam. 


As you can see here, the quilted band I made was longer than I needed, so I trimmed it to match the back seam lines and then stitched the back seam.


Here is the back seam from the inside. I often like to serge my seam allowances in a different but complimentary color. It saves me from buying so many different colors of serger thread that in the end I may not use.


Here is the back seam from the right side. I was pleased with how the seams and quilt stitching lined up. Now, I don't have pictures of the next steps but I followed the same steps for the waistband and added an invisible zipper. I also made a quilted sash belt that gives the skirt the finishing touch. I'm so pleased with this knock off project. This post was so long, I  will share the finished skirt in the next post...stay tuned.

Thursday, April 4, 2013

Peplums, Fancy Pants and Meatballs

I think these pants are just the best pants I have ever owned. Period. No, I didn't make them otherwise I would have a pair in every crazy print I could find. I can't make pants...yet. (I'm an optimist) Remember my last attempt, I know I'd rather not. Now that I have expressed my undying love for these pants...I'll move on to the top I made just so I could wear these pants on this blog. Showing off my fancy pants... Yup.


I used  Newlook 6196. I made view A with the cap sleeves. The pattern was pretty straight forward and fit well enough. Although, I find the waistband a little to high, which is not unusual for me but I almost always forget to check. I got excited to start this top and rushed ahead without thinking. Oops. Sometimes I'm a slow learner.

Top:self-made Fancy Pants:Joe Fresh Shoes:Payless Purse:Winners Necklace:a mystery 


As a side note, I should never be allowed to wear white, I dropped a meatball on the front of my pretty new top. Luckily you can't see the greasy spot (ok so maybe you can, so what). I always blamed my kids for my inability to wear and maintain white clothing but maybe, just maybe, it's me that's the slob after all. Sorry kids.