Showing posts with label Project Sewn. Show all posts

Monday, May 12, 2014

Floral Frenzy


Or as my daughter calls this skirt...Floral Brilliance. (??) I had this fabric in my stash knowing that it would become another McCalls 6706 skirt but felt that I had made so many of these that maybe I should give it a break. Then cue...  Project Sewn's next season and this week's Floral Frenzy challenge. Out came that fabric and this skirt materialized. I think I could almost make these in my sleep now!
I thought about linking up all the skirts from this pattern but there are too many and I'm just too lazy. This is the second post in one day...way too much typing, not enough sewing.


 I wore this with my new biker jacket today. I'm loving this jacket..


 For those of you looking for the details of this skirt....  


My review:

Pattern: McCalls 6706

Fabric Used: A good quality quilting cotton.

Instructions: Were easy to follow and worked out perfectly.

Changes I made: Pockets. I love pockets so I made a back seam and moved the zipper to the back and inserted pockets in the side seams. I also made the waistband a little wider.


Don't forget to head over to Project Sewn to vote for your favorite contestant and sewalong contestant!


Wednesday, May 7, 2014

Charlie Jumpsuit


Project Sewn's newest season is now underway and the first challenge is titled Leading Ladies. Well, let me tell you first that all the ladies in this season are leading ladies in their own right! Their creations for this challenge are phenomenal! Be sure to go vote for your favorite and good luck choosing just one!

I decided to sewalong this season and was excited to start the first challenge... I would usually choose a project based on some forties or fifties era movie but I couldn't seem to stop thinking about the Charlie's Angels TV show from the seventies. Gosh, I loved watching reruns of that show as a kid! Besides...is there ever going to to a better excuse to make myself a jumpsuit?! Yeah no. Probably not. 

Here is an eyeful of jumpsuit inspiration for you to feast upon! Your welcome.


While tempted to make a most flattering sequined jumpsuit... I opted to make what I hoped turned out to be a more modern version.


Warning: This is not a tutorial. Not even close.
 This project is a mash up of two patterns but one pattern was hacked up almost beyond recognition. Oh the fun! For the bodice, I used Simplicity 2444. Anyone who follows here knows my love affair with this pattern runs deep. Real deep people. This bodice being a tried and true pattern for me made it a perfect start. Besides, if this jumpsuit thing flopped then I could always fall back on making it into a dress.

The pants are this Newlook pattern. I know... the finished product looks nothing like the drawstring pants of the original. This is where I played around and added front pleats and back darts (that are kind of long, I realize..). I tried the two on together and measured what I would need for a waistband.... you know to fill that gap. I used an invisible zip of course because I actually don't know how to insert a proper lapped zip. There. I said it. I stink at lapped zips.


This project was pure fun for me both to make and I'm sure to wear. I can think of sooooo many ways to wear this jumpsuit. Don't forget to vote for your favorite designer over at Project Sewn as  well as your favorite sewalong contestant!

Saturday, February 8, 2014

Under Construction


Hey all! So I'm back with this dress that I made for Project Sewn's sewalong to share with you the changes that I made to the construction process. I almost always make this change to the process when I am making a sleeveless dress or top. All because I don't like to attach the shoulders last. I can never make them look neat and nice. Attaching the facings and pulling them through gives me a nicer, neater look and offers me the ability to make fitting adjustments to the side and back seams last.


This dress had a separate front shoulder that I sewed in first.


The pattern called for gathered shoulders and I opted instead for pleats. I almost always will choose pleats over gathers. I'm not really sure why.... I just like them I guess. I just made sure that I pleated them to the same width as the as the back shoulder pieces.


Now, because I didn't attach the facing to right shoulder piece before sewing it to the bodice, it won't fit of course. Using the pattern piece to trace out the bottom portion of the facing and the top of the pleated portion, I drafted out a new facing. 


This new left front facing was sewn to the right front facing in the same manner as the bodice pieces were.


Now, sew the facings together, front to back, at the shoulder seams. (yes...the interfacing is missing....I didn't have any left and leaving the house to get some was not at all appealing that day. The fabric being a taffeta, had lots of body to it so it didn't seem to make a difference...but still..bad seamstress! very bad!)


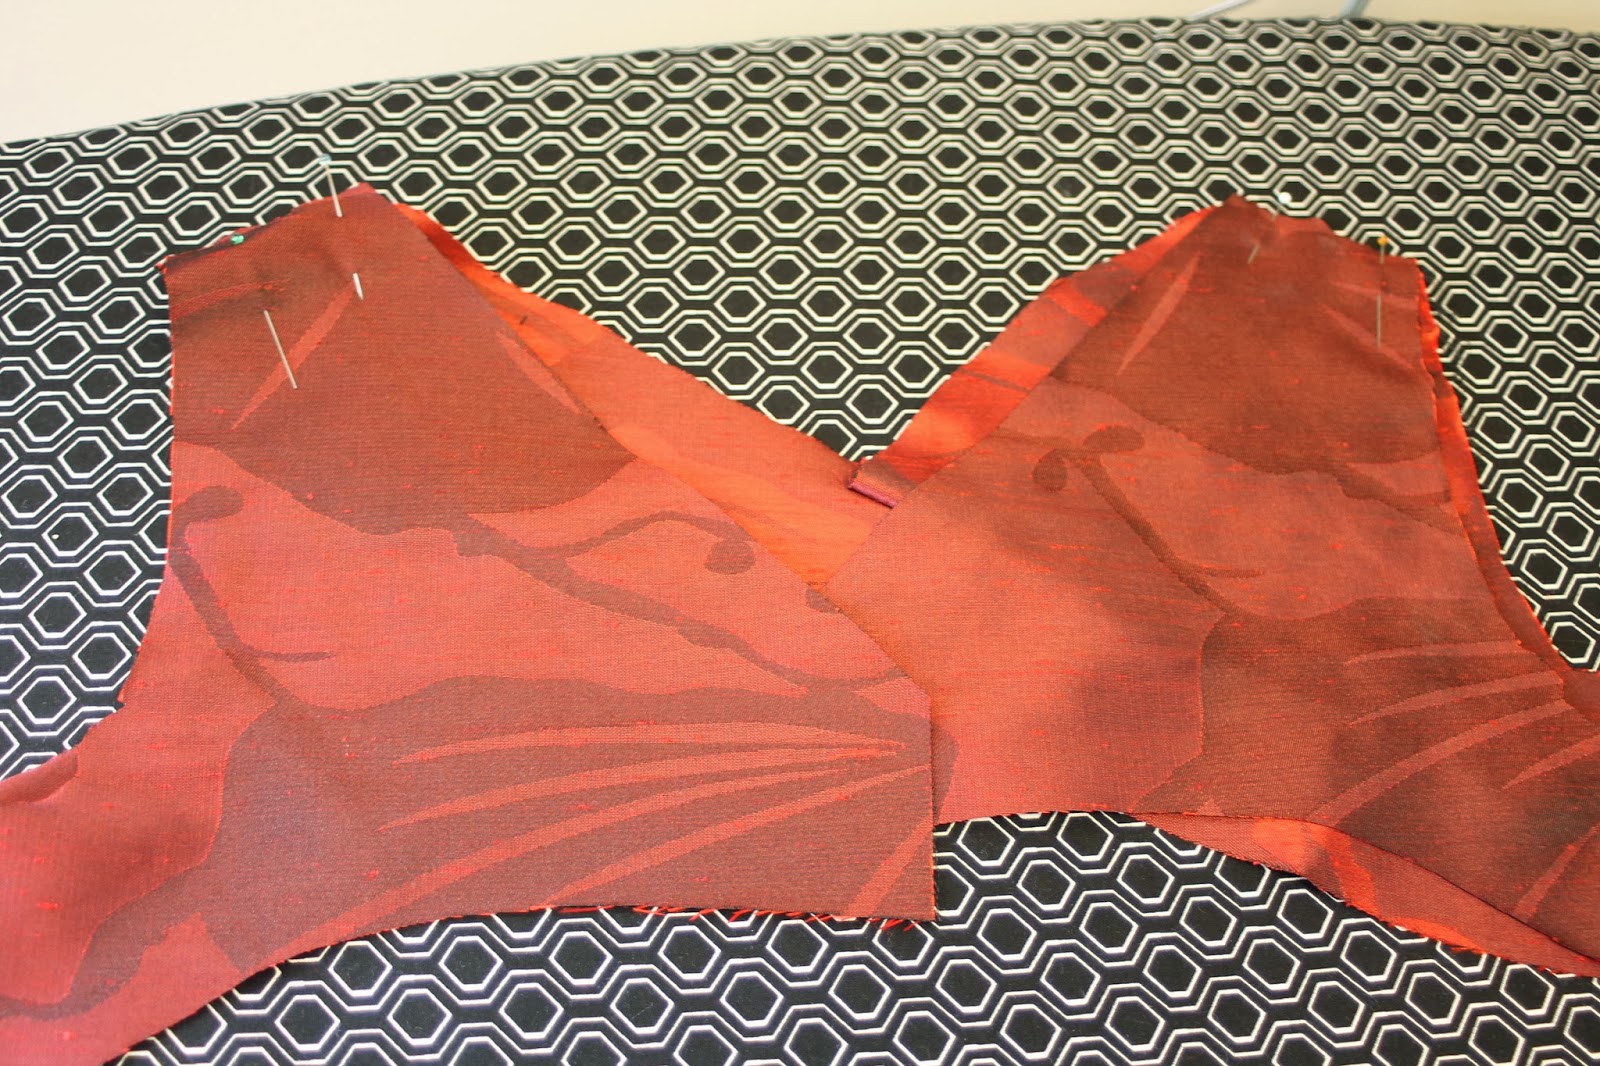
Also, do the same for the dress pieces. The basic steps always run this way, sew front to back at shoulder seams on both the main dress and the facings. Do not touch the side or back seams at all! Yet.


With right sides together, pin the facing to the dress, matching carefully at the shoulder seams. Sew around front and back neckline in one seam. Then each armhole and clip all curves. I like to clip a lot to ensure a nice flat finish when I turn it right side out.


This next step is always my favorite. Pull each back section up though the front. Because the back pieces are not attached to each other, you can easily do this. Pull each side though and press. 


At this point, here is what you are left with.... this.


Order of operation from this point for me usually goes as follows...side seams, invisible zipper, back seam below zipper, serge seam allowances and hem, then of course hand stitch the hem. 
I always like to serge my seam allowances separately so that if I have to take in or more importantly, let out side seams for a little more room ....(what!? it happens!!) , I don't have to deal with the serged edge.
Whew! That maybe sounds like a lot of work but it's really not. If I can do it....


Thursday, February 6, 2014

Project Sewn Fashion Icon Challenge


Project Sewn has their new contest underway and it is so much fun and inspiring to see what the contestants are making! This weeks theme challenge is Fashion Icons. I wanted to sew a long but the choices for fashion icons are many.. making it very difficult for me to chose. I went with my first thought...Jackie O. I have always loved her classic style and even styled my hair in a flip in highschool! 

I have had this Butterick pattern in my stash for as long as I can remember. I made a few changes to the construction which I will share in another post. The most obvious change is the shoulder bows....I omitted them all together and just for this photo shoot put a bow at the waist. (The bow will not be worn out in real life) If you look at pictures of Jackie, you will notice that she wore bows at her waist often. And pearls of course pearls. I put on every string of pearls I own...real and faux. I do have a genuine affinity for pearls especially after my dad gave a heart melting speech at my wedding comparing me to pearls...a precious gem. I could cry now just thinking about it.

Well, I don't know where that came from.....Anyways. I do love this dress and think it will be perfect for a wedding or a special date night. Now go check out Project Sewn's contestants and sewalong contestants and place your vote. I warn you though...these ladies don't make it an easy task!

Friday, October 18, 2013

I Sewed Along Not Knowing It Was A Sewalong..


It was so nice of a lovely reader from So I Sewed This to make the suggestion that I enter this dress in Project Sewn's Graphic Print sewalong...umm..... sewalong aside for just a moment... where have I been to have missed following this contest from week one!??   Oh my gosh ...these ladies are talented!


I hope you don't all live under a rock like I apparently do and have already voted for this weeks designs that are based on a graphic print theme. If you missed voting for the designers in the contest you can still go and vote for you favorite submission in the Graphic Print Challenge sewalong... 

I am always in awe of the many talented sewists in this blogging community...go check them out and vote for your favorite!