Thursday, February 13, 2014

Sewing Organization (Part 1)


I like patterns...I like to have a lot of patterns. Some of them I have made up and others are still patiently waiting for their turn. When I shared the pictures of my new sewing space, my patterns could been seen in neat little plastic totes. Looks good right?


Yeah weeeell..... here is the reality
....and this really isn't as bad as things usually get.


When I'm looking for a pattern or I am trying to decide which pattern to use, I make a big mess and it's never contained to my sewing space. No. I like to spread the love and spread it all over the family room coffee table. And sofa. And couch. And floor.
So,while perusing Pinterest yet again for inspiration... it occurred to me, " Why don't I have a board for my patterns?". Yeah, why don't I? Well, now I do. You can go see it here.


I couldn't find all my patterns and so I had to upload some of them myself. It is not quite finished but I am well on my way.  I would like to go back and mark each pattern pin and indicate whether or not I have made it or not. That should help me bust this pattern stash to bits! Kapooow!
 The entire project may have taken some time to do but was worth it. I can now go to this board and view all of my patterns at once. During the process, I was also able to evaluate what I had in  my collection and whether I needed it or not. I have a few that I would like to share with you. They are all uncut patterns and in great condition. I just can't see myself making them anytime soon. 


                                Newlook 6647(size8-18)                     Newlook 6023(size 6-16)


Butterick 5277 (size 14-20)                            Vogue 8491(size 6-12)

It will be first come first serve for these patterns, so if you would like to add any of these to your collection just leave me a comment with your email and choice of pattern, then I will get it off to you! No matter where in this world you sew your stuff!


Monday, February 10, 2014

Bubbling Over


Well, I finally feel like sewing again! But before I get to my sewing project I'd like to talk a little thrift with you. This coat. Serious love affair with this one people. I bought it a couple of years ago and it is a classic piece in my coat collection. I can't tell you how many times I have been complimented on this one. I just love the silhouette and color. And of course its warmth!! The snow is beautiful but chilly!

Coat:Kenar(thrifted) Turtleneck:Denver Hayes Skirt:self-made Booties:Madden Girl
Necklace:Suzy Shier Sunglasses:Joe Fresh

Ok, so enough gushing over my thrift find and on to the skirt. I used Newlook 6107 view D.

My Review: 

Pattern:  Newlook 6107

Fabric used: A lovely polka dot wool! The polka dots are flocked.

Instructions: The instructions were clear and straight forward.

Changes I made: The only change I made was adding a lining to this skirt. I like a lined skirt in the winter...it makes wearing tights easier. Oh and I used an invisible zipper...as per usual for me. They are my favorite. 

Repeat worthy? Yup! This skirt is basic and has a great fit for me. I can see myself making this one repeatedly!


It feels good to be sewing again... a dress and a skirt all within a week! I'm bubbling over with excitement and a wonderful sense of accomplishment! The only down side to such productivity is a VERY messy sewing room and a laundry hamper bubbling over as well! 

Saturday, February 8, 2014

Under Construction


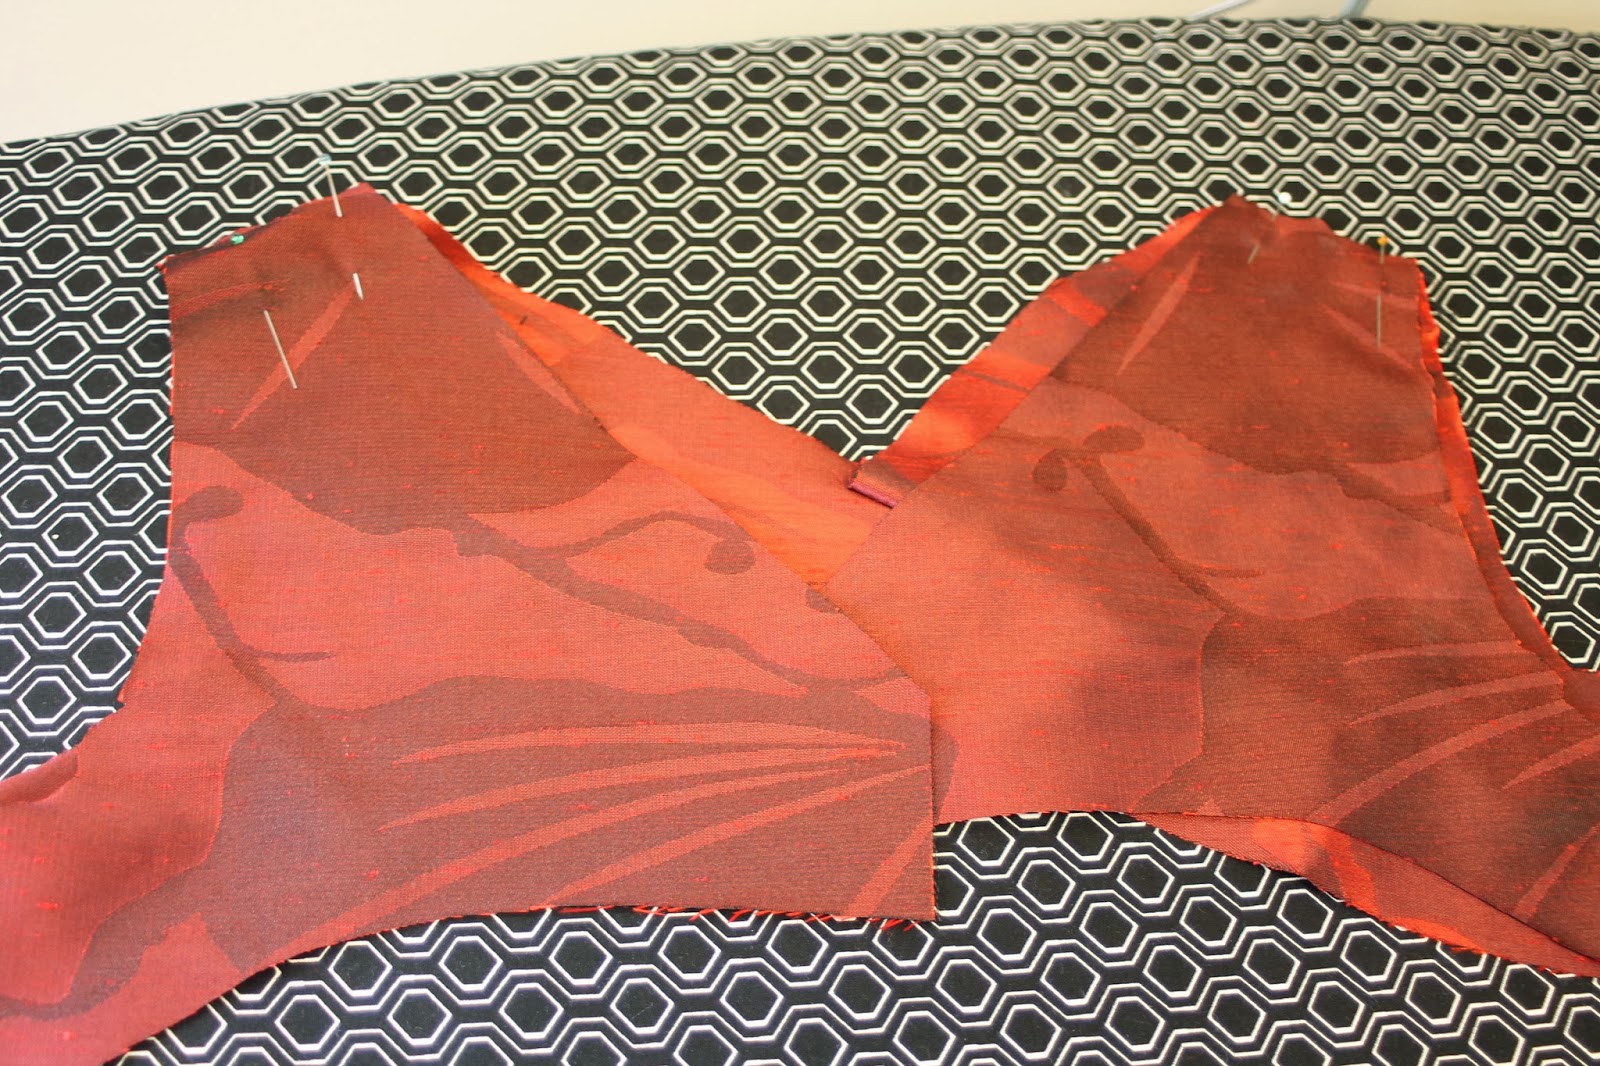
Hey all! So I'm back with this dress that I made for Project Sewn's sewalong to share with you the changes that I made to the construction process. I almost always make this change to the process when I am making a sleeveless dress or top. All because I don't like to attach the shoulders last. I can never make them look neat and nice. Attaching the facings and pulling them through gives me a nicer, neater look and offers me the ability to make fitting adjustments to the side and back seams last.


This dress had a separate front shoulder that I sewed in first.


The pattern called for gathered shoulders and I opted instead for pleats. I almost always will choose pleats over gathers. I'm not really sure why.... I just like them I guess. I just made sure that I pleated them to the same width as the as the back shoulder pieces.


Now, because I didn't attach the facing to right shoulder piece before sewing it to the bodice, it won't fit of course. Using the pattern piece to trace out the bottom portion of the facing and the top of the pleated portion, I drafted out a new facing. 


This new left front facing was sewn to the right front facing in the same manner as the bodice pieces were.


Now, sew the facings together, front to back, at the shoulder seams. (yes...the interfacing is missing....I didn't have any left and leaving the house to get some was not at all appealing that day. The fabric being a taffeta, had lots of body to it so it didn't seem to make a difference...but still..bad seamstress! very bad!)


Also, do the same for the dress pieces. The basic steps always run this way, sew front to back at shoulder seams on both the main dress and the facings. Do not touch the side or back seams at all! Yet.


With right sides together, pin the facing to the dress, matching carefully at the shoulder seams. Sew around front and back neckline in one seam. Then each armhole and clip all curves. I like to clip a lot to ensure a nice flat finish when I turn it right side out.


This next step is always my favorite. Pull each back section up though the front. Because the back pieces are not attached to each other, you can easily do this. Pull each side though and press. 


At this point, here is what you are left with.... this.


Order of operation from this point for me usually goes as follows...side seams, invisible zipper, back seam below zipper, serge seam allowances and hem, then of course hand stitch the hem. 
I always like to serge my seam allowances separately so that if I have to take in or more importantly, let out side seams for a little more room ....(what!? it happens!!) , I don't have to deal with the serged edge.
Whew! That maybe sounds like a lot of work but it's really not. If I can do it....